Showing posts with label full heart punch. Show all posts

Friday, June 15, 2012

An Apple for the Teacher


     In my last post, I showed a teacher bouquet I made - see it HERE.  Along with the bouquet, I made this card:


     This is a 3-D apple, which lays semi-flat in an envelope.  I would not send this card, unless extra postage is added.

    I CASEd this card from Lydia Fiedler from Splitcoast Stampers.  She has a tutorial HERE.  It was so super easy to make.  The toughest part was inking the edges.  Next time I make this apple, I will definatley ink the edges BEFORE I adhere them all together.

RECIPE

CARD STOCK:  Bolds Designer series paper & Early Espresso

INK:  Real Red, Early Espresso, & Old Olive

STAMPS:  Smarty Pants (retired)

TOOLS:  Full Heart Punch & Bird Builder Punch, S.N.A.I.L. Adhesive & Stamp-a-ma-jig

Click HERE to order Stampin' Up! products from my website, 24/7


Pin It

Saturday, March 19, 2011

Happy St. Patrick's Day (a little late)

     I'm so sorry it's been awhile since I've last posted.  We were giving the state tests this week, and every night I was coming home exhausted.  Last night I went to bed and hour after my boys did - that's how tired I was.

     Since Thursday was St. Patrick's Day, I wanted to share the two things I made, (I'm not Irish, and I just don't get that excited about this holiday - sorry!)


     This card was designed by Bonnie Fields, a fellow SU! demonstrator.  This was her card for our dessert night this past Monday evening.  It was super simple to make, and it's gorgeous!

RECIPE:

CARD STOCK:  Whisper White, Early Espresso, & Garden Green


INK:  Garden Green


STAMPS:  Lucky Shamrock


TOOLS:  Big Shot, Perfect Polka Dots Embossing Folder, Full Heart Punch, 1-3/4" Circle Punch, Corner Rounder Punch, Gold Brads, Mat Pack, Piercing Tool, & Dimensionals

Click HERE to order Stampin' UP! products, 24/7, online from my website.

     Here a St. Patrick's Day box I made:


     This is the same box as I made in THIS post.  After I made the one for Valentine's Day, I knew I wanted to make one for St. Patrick's Day.

RECIPE:

CARD STOCK:  Handsome Hunter (retired), Very Vanilla, & Presto Patterns Speciality Designer Paper


INK:  Early Espresso, Handsome Hunter & Glorious Green (both greens are retired)


STAMPS:  Got Treats?


TOOLS:  Big Shot, Box #2 Die, Whisper White Taffeta Ribbon, Mini Library Clips, Crimper, Paper Cutter, Stampin' Sponges, SNAIL Adhesive, & Sticky Strip

Click HERE to order Stampin' UP! products, 24/7, online from my website.

     I used retired paper to use up my stash.  I hope this prompts you to pull out your stash and use it.  It's not doing any good in hiding.

Happy Saturday!
Pin It

Saturday, January 29, 2011

Tissue Box Cover

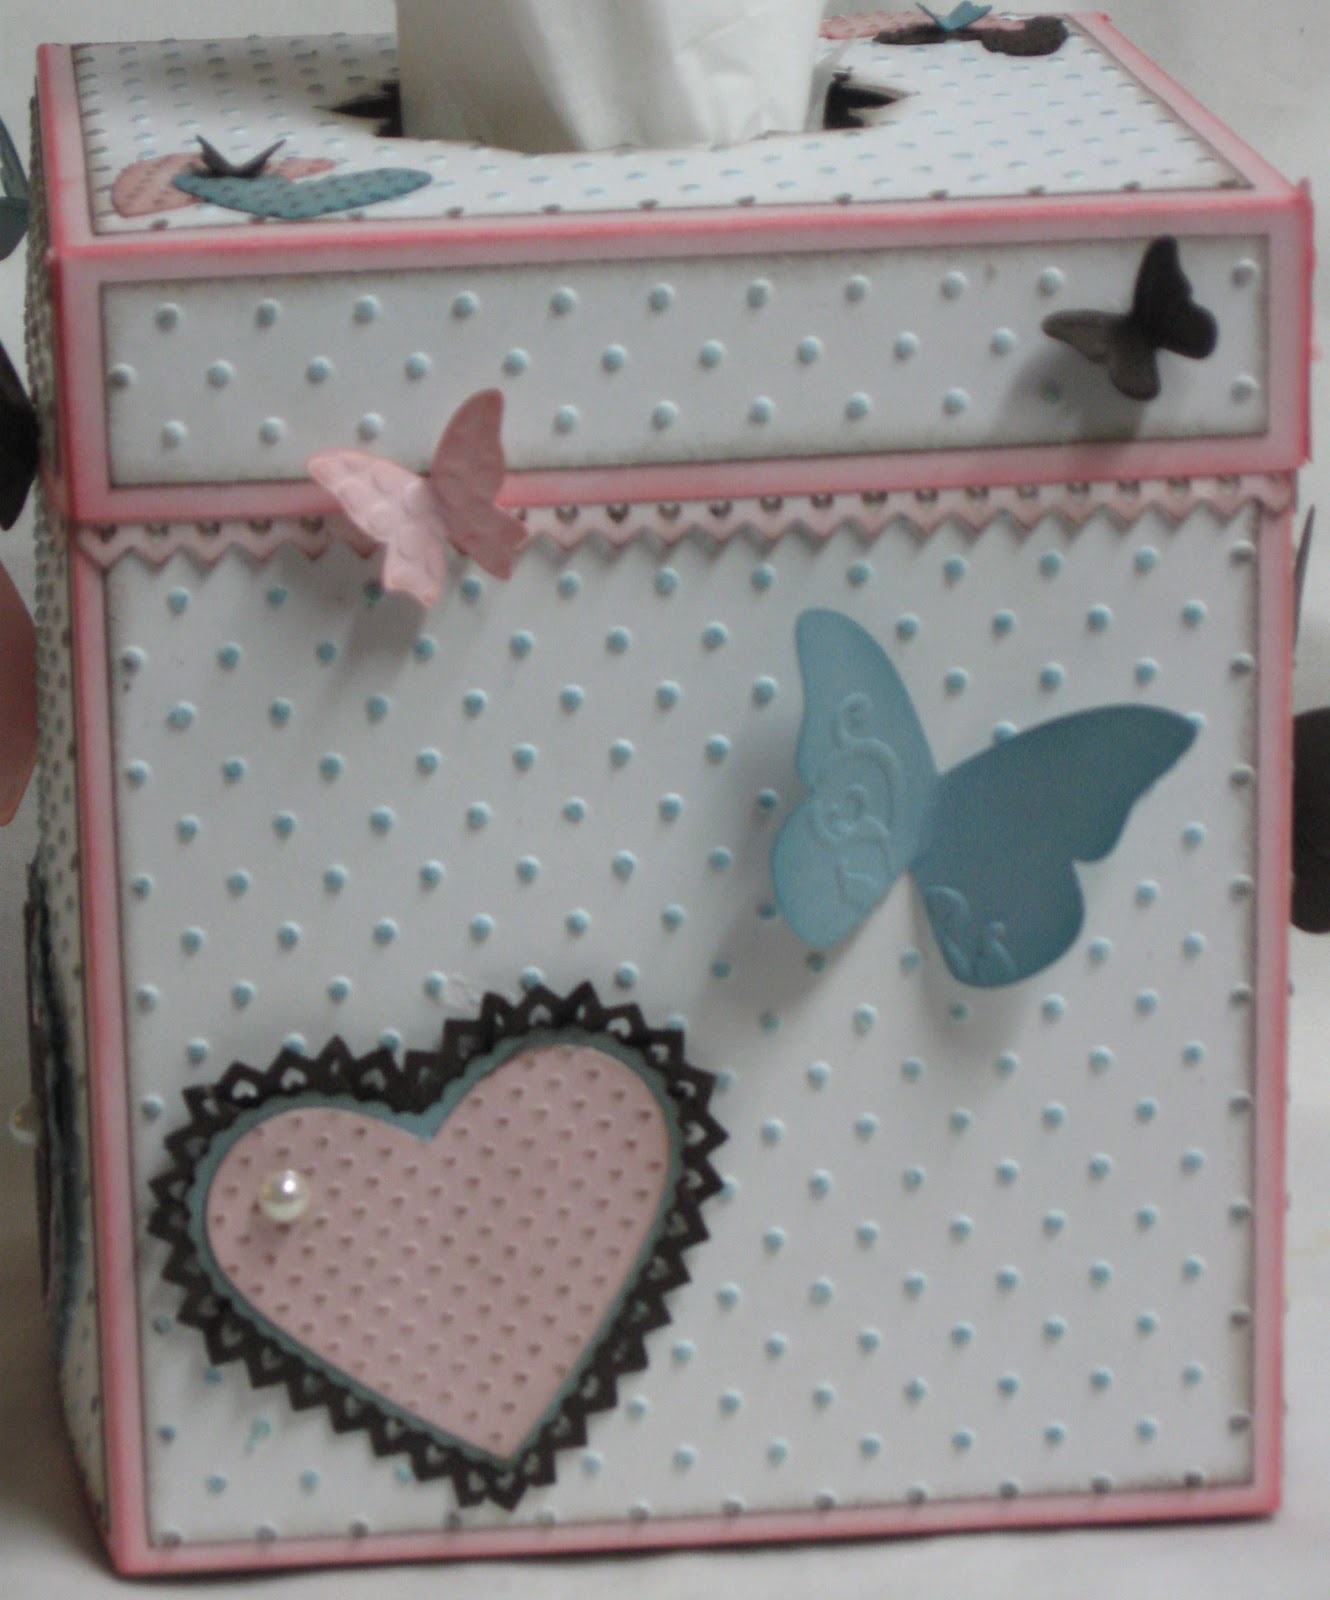
     So, have you guessed yet what I used the hearts from yesterday's post on?  No, not a card.  No, not a scrapbook page.  No, not a Valentine.  But this:

...a tissue box cover!  What do you think?

     I found the pattern and directions on Splitcoast Stampers.  The minute I saw this project I knew I wanted to make one.   I went to my Color Coach to pick the colors.  I knew I wanted to use Pink Pirouette, but I didn't know what other colors to use.  The Color Coach is the BEST tool  ever!  I came up with Pink Pirouette, Baja Breeze, and Early Espresso.  It is a beautiful color combination!

     The really hard part in making this was deciding how to decorate the box.  I spent about a week trying to decide what to do.  I didn't want it to be "Valentiney" (is that a word?), but I also wanted the frills and "girly" look to it.  During that week, I just started playing with things and the lacy heart was born, see my post HERE for a free tutorial on how I made the hearts.

     Here is a view of the top of the box:

Sorry this picture is blurry  :O(
     I will tell a little secret, that you must promise not to tell.  I used a Nestability to do the opening on the top.  I really struggled with how to do the top and I could only come up with a product not sold by Stampin' UP!

     Here are pictures of each side of my box:


RECIPE:

CARD STOCK:  Pink Pirouette, Baja Breeze, & Early Espresso

INKS:  Pink Pirouette, Baja Breeze, & Early Espresso

TOOLS:  Big Shot, Perfect Polka Dots Embossing Folder, Beautiful Wings Embosslit Die, Scalloped Heart of Hearts Embosslit Die, Pinking Hearts Border Punch, Full Heart Punch, Basic Pearls Jewel Accents, Stamping Sponges, & Tombow Multi-Purpose Adhesive, SNAIL Adhesive, Color Coach, & Crimper

NON-SU! TOOLS:  Spellbinders  Blossom Two Nestabilities (I used the middle sized one of the 5) & Kleenex Tissues

Click HERE if you would like to order any of these products.

     I hope you have enjoyed seeing my tissue box!  If you are interested in making one, contact me.

Happy Saturday!
Pin It

Friday, January 28, 2011

Snow Day Project Sneak Peek

SNEAK PEEK:  Can you guess what I put these on?  I bet you can't!


     If you guessed a Valentine's Day card, you'd be wrong.  You will have to come back tomorrow to see what I did with these beautiful hearts.

     Now on to these beautiful hearts.  Here are close ups of each of them:


     I used the Scalloped Heart of Hearts Embosslit, the Full Heart Punch, and the Pinking Hearts Border punch to make them.  I punched out a Full Heart Punch and then placed it in the middle of the Heart of Hearts embosslit and ran it through the Big Shot.  That is how I got the polka dots on them to match the heart under it.

FREE TUTORIAL:

     To do the lace around the heart, I punched out an 8 in strip using the Pinking Heart border punch.  I then cut it at 3/4" wide.  I then ran it through my crimper 3 - 4 times.  I then took my bone folder and "curled" the strip - on both ends.  What the crimper and curling does is loosen the fibers in the paper and it ends up in two layers that you can pull apart.  This makes the paper very easy to manipulate and work around any shape.  I used SNAIL adhesive on the back of the heart and put the lace on my hearts.  When I had the lace looking the way I wanted it, I punched a Full Heart Punch from scrap paper and used Tombow adhesive to glue it on the back, to hold the lace in place.  I really love the look of the lace on these hearts.

RECIPE:

CARD STOCK:  Pink Pirouette, Baja Breeze, & Early Espresso

INK:  Early Espresso

TOOLS:  Big Shot, Scalloped Heart of Hearts Embosslit, Full Heart Punch, Pinking Heart Border Punch, Crimper, Basic Pearls Jewel Accents, SNAIL Adhesive, Tombow Multi-Purpose Adhesive

     I'd love to teach everyone how to make these beautiful hearts.  If you are interested in learning how to make these, let me know.  I'd be happy to set up a class for those of you who are interested.

Happy Friday!
Pin It

Monday, January 10, 2011

Non-Traditional Valentine with Letterpress Plate

     Non-traditional Valentine colors:

     I'm really happy with this color combo.  I got the idea from Stampin' UP!'s Color Coach.  I love pink and brown together, but I really wanted to use my new Baja Breeze Glass Glitter, and came across this combo of colors.  I think it's a nice look for a Valentine's Day card.  What do you think?

     The other nice thing about this card is that aside from the card base, I used all scraps to make this card.  Anther plus for those of you that are looking for ways to use your scrap paper.

RECIPE

CARD STOCK:  Baja Breeze, Pink Pirouette, & Early Espresso

INK:  Versa Mark & Pretty In Pink

STAMPS:  Short & Sweet

TOOLS:  Big Shot, Lots of Love Letterpress Plate, Scalloped Heart of Hearts Embosslit, Full Heart Punch, Baja Breeze Glitter Glass, Tombo Mono Glue, SNAIL Adhesive

Click HERE to shop online for any of these products.

     I've been really enjoying using these letterpress plates.  Stampin UP! recommends you use Craft ink and Watercolor paper.  I have found that I really like using Versa Mark ink and card stock.  I love the look it gives you.

     If you would like to try out Stampin' UP!'s letterpress plates, let me know, I'd love to have you come over and give it a try!

Happy Sunday!
Pin It

Wednesday, January 6, 2010

Heart shaped treat cups card idea

     Check out this idea using the heart treat cups, full heart punch, scallop trim border punch and sweetheart stamp set, along with some paper and ink.


     Quick, easy, and fun.  This is a great project for kids to make and/or receive.  I'd be happy to show you how to make this card.  Just contact me.

Happy Wednesday!

Pin It

Tuesday, January 5, 2010

Heart shaped treat cups & matching stamp set


Stampin' Up! NEW product - 
HEART shaped Treat Cups!

(Available for purchase beginning TODAY-
order early to ensure product availability.)


     Just in time for Valentine's Day -- our new Heart Treat Cups coordinate perfectly with the Sweetheart stamp set and the Full Heart punch. While the new Heart Treat Cups are ideal for Valentine's Day, they are also perfect for many other occasions including Mother's Day, wedding and bridal shower favors, anniversary cards, or just simple projects that show you care.

  • Heart Treat Cups (#120435) and the coordinating Sweetheart stamp set (#120415) are available for purchase TODAY!
  • While this is not a limited-time offer, we are not certain how long the initial inventory (earmarked for Valentine's Day) will remain in stock. It is possible that the Heart Treat Cups (#120435)  may be back ordered for a short time prior to Valentine's Day. So, order early and often!
  • The coordinating Sweet Treat Padded Envelopes (#116802) and the Full Heart punch (#113693) are available for purchase now.
    To purchase your Heart Treat Cups, Sweetheart Stamp Set, Full Heart Punch or the Sweet Treat Padded Envelopes, call me, e-mail me, or order online 24/7 at my Stampin' Up! website.

     As a side note:  I will be holding a class on Sunday, January 24th, at 1 PM (at my house), using these items.  Once I get my order, I will create and post a picture of what we will be making.  The cost is $8 or FREE with a $35 order.  Contact me if you are interested in attending this class.  It promises to be a lot of fun!  Plus it will help you get ready for Valentine's Day, early--always a good thing :O)

Happy Tuesday!

Pin It

Monday, November 16, 2009

CUTE Turkey!

     You've got to check out this cute turkey!


Isn't he just the cutest thing?  I will definitely be making him (when I have a little time).  He was made by Kim Score.  She has all the punches needed and the directions on how to make this ever-so-cute turkey HERE.  Go check it out!

Click HERE to order Stampin' UP! products.

Happy Monday!
Pin It

LinkWithin

Related Posts with Thumbnails

Popular Posts

Labels